
 |
| Simply love the Bear buns. Someone commented the bear look like they just have their milk |
 |
| They are cute right? |
 |
| Can't bear to eat it but let have one! |
 |
| Oh ya! Show off my new toy. :) |
Chocolate Kawaii Bear Buns
Recipe from Nasi Lemark lover
Ingredients:
Recipe from Nasi Lemark lover
Ingredients:
- 350g bread flour
- 40g caster sugar
- 15g unsweetened cocoa powder
- 0.5 teaspoon salt
- 1 teaspoon instant yeast
- 230ml fresh milk
- 25g unsalted butter, soften
Decorate the Beary Buns
- Chocolate chips, melted
- White chocolate chips, melted
Filling
- Nutella or Cream cheese
Steps
- Knead the dough till elastics, you can use a bread maker/stand mixer/ hands.
- Proof the dough for 1 hr or till it doubled it size.
- Pouch out the air from the dough. Divide the bread dough into 16pcs, each weigh about 35g (For Bear face) & 32pcs, each weigh about 2g(For Bear ears).
- Use the 35g dough, flatten it, fill up with a small scoop of nutella/cream cheese and wrap it into a ball. Lay them on a square baking pan (9 inches x 9 inches). Repeat the same till u use up the 35g dough.
- Use some milk and brush it on the 2g dough. Paste the 2g dough on the face lightly. Repeat the same until finish pasting all the ears.
- Let it rest for another 30-45 mins or till it doubled it size,
- Bake the bread in a pre-heated oven for 20 mins under 180C.
- Let the bread cool down before final touch up for the bears eyes & mouths.
- Melt the white & dark chocolate chips separately. Use a paintbrush to draw the white portion with white chocolate & draw the eyes & mouth portion using a pipping bag.
- It's ready to serve.
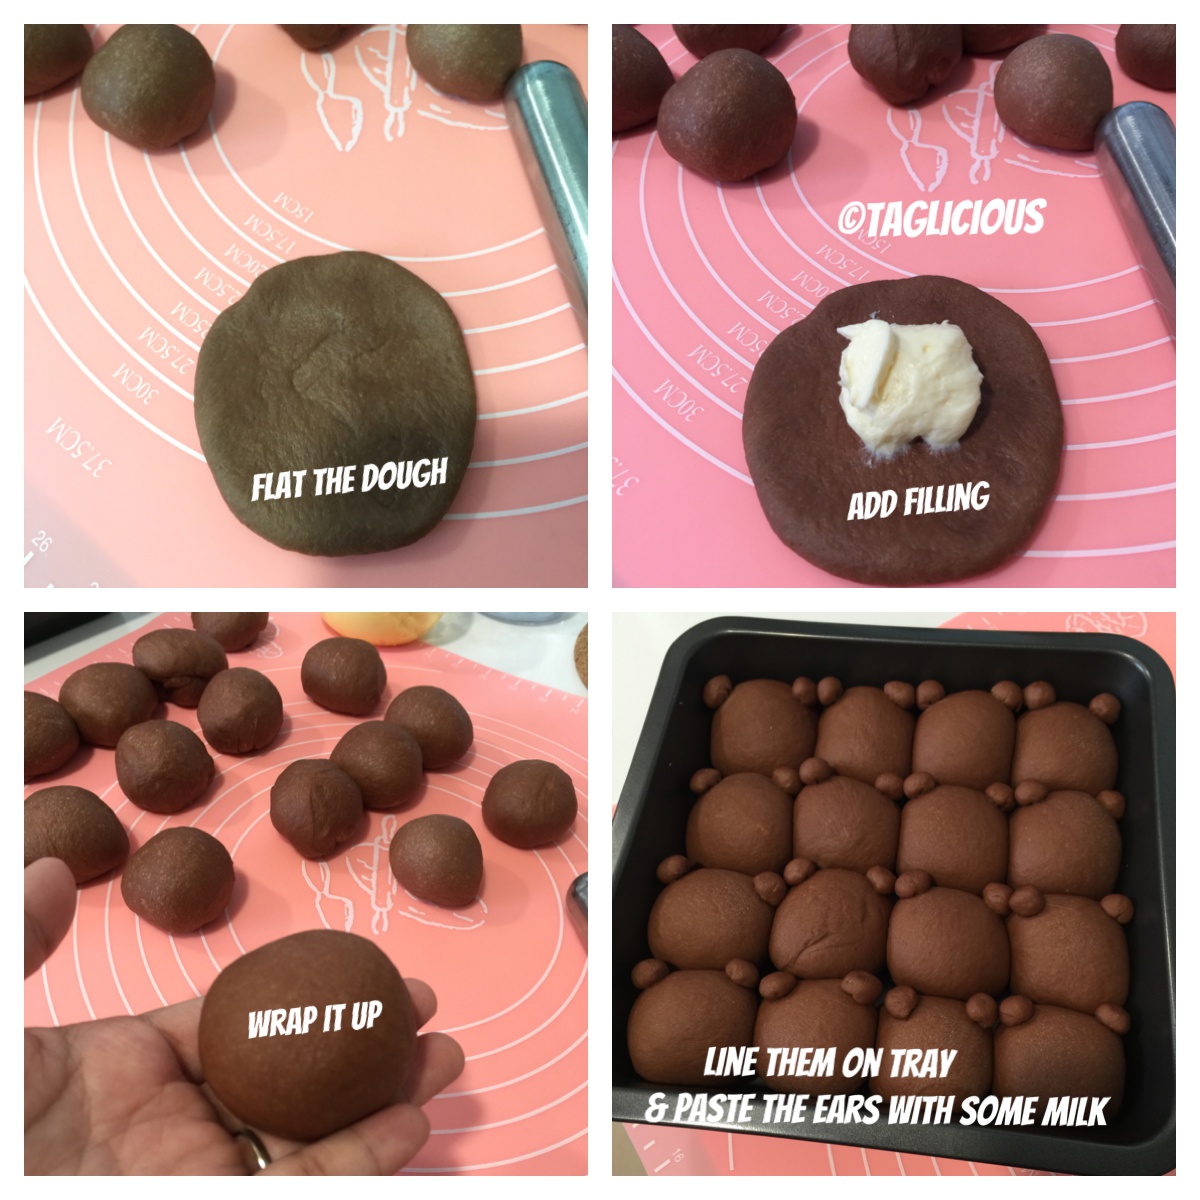 |
| Pictorial on wrapping the filling and lay them on the baking tin |
 |
| You can start drawing the face, eyes & nose! |
 |
| Which one you love? The bear or a heart shape? Use the extra dough to make it. :) |
No comments:
Post a Comment